Monday, February 23, 2009

Migration of DataForms in Hyperion Planning

The goal of this post is to explain how to migrate data forms from one environment to another in planning applications. The automation of this process helps to reduce time and leaves no scope for human error.

FormDefUtil.cmd utility can be used to move data form definitions from one Planning application to another. Data form definitions can be exported or imported from an XML file. This utility is extremely useful when Data forms need to be moved from a development environment to a production environment.This utility uses a command line interface and is installed in the bin directory (D:Hyperion\Planning\bin). This utility runs only on Windows-based systems (even if application servers are on UNIX). Only administrators can run it. The utility is located on Planning server as shown below.


Steps to export Data Forms :

1. Launch the FormDefUtil.cmd utility from the bin directory using this syntax:

formdefutil export Formname/-all server name user name password application


The utility creates an XML file in D:Hyperion/Planning/bin and logs errors in FormDefUtil.log in the directory from which you run the utility (by default bin). You can copy the utility to any directory and launch it from there to save files to another directory.


Steps to Import Data Forms :

1. Launch the FormDefUtil.cmd utility from the bin directory using this syntax:

formdefutil import Location of Formnames server name user name password application


This completes migration of data forms from one environment to another in planning applications.
Automation of Dimension extraction

Hi Guys,
good morning.
today we will learn how to automate dimension extraction from essbase.
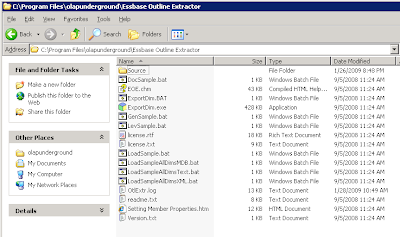
There is a very good utility called outline extractor in

http://www.appliedolap.com

Step # 1
As a first step you should install Outline extractor.


Step # 2

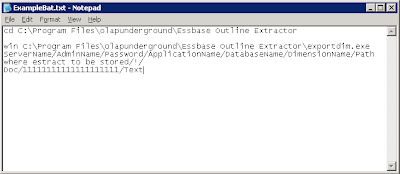
Build a batch file providing details of your application and database and dimension you want to extract as follows:

cd C:\Program Files\olapunderground\Essbase Outline Extractor

win C:\Program Files\olapunderground\Essbase Outline Extractor\exportdim.exe ServerName/AdminName/Password/ApplicationName/DatabaseName/DimensionName/Path where extracted file to be stored/!/ Doc/11111111111111111111/Text


You can schedule the above batch file to run at fixed time using various schedulers like Window scheduler etc.

Hope this helps.
Have a BLESSED day.

Tuesday, February 17, 2009

Import Security in Hyperion Planning applications

Hi Guys,
good morning.
lot of times there will be a huge number of requests to grant or remove security access for users.
for one or two changes, it is simple task, click on member and then assign access and grant permission. It becomes tiresome when we need to make changes for large number of members.
it involves considerable amount of time.
Automating the security changes saves considerable amount of time. The ImportSecurity utility in planning loads access permissions for users or groups from a text file into Planning. Importing access permissions using Import security utility overwrites existing access assignments only for imported members, users, or groups. All other existing access permissions remain intact. The SL_CLEARALL parameter clears all existing access permissions.

ImportSecurity utility is located at D:\Hyperion\Planning\bin on Planning server as shown in the following picture:


Steps for importing access permissions:

Step 1: Create a text file and name it as Secfile.txt and save it in bin directory (D:\Hyperion\Planning\bin). Example of Secfile.txt is shown in picture below where Planning_Security_Group is group name, MemberName is member name, Write is Access permission, and MEMBER is relationship.


Step 2: Locate the ImportSecurity utility by navigating to the bin directory.


Step 3: From the Command Prompt, enter this case-sensitive command, one space, and the parameters. Separate each parameter with a comma, and enclose parameters with double quotation marks:

ImportSecurity.cmd “appname,username,password[delimiter],[RUN_SILENT],[SL_CLEARALL]”

Where:
appname : Name of the Planning application importing access permissions.

username : Planning administrator user name.

password :Planning administrator password.

delimiter (Optional) : SL_TAB, SL_COMMA, SL_PIPE, SL_SPACE, SL_COLON, SL_SEMI-COLON. If no delimiter is specified, comma is the default.

RUN_SILENT ( Optional) : Execute the utility silently (the default) or with progress messages. Specify 0 for messages, or 1 for no messages.

[SL_CLEARALL] (Optional): Clear existing access permissions when importing new access permissions. Must be in uppercase.


You can check the results in log file in bin folder.

Monday, February 9, 2009

Load dimension members into Planning Application using HAL from Relational Database

Hi Guys,
Good afternoon.
please find the process of loading metadata into planning application using HAL (Hyperion Application Link).
In the example below, I am loading employee dimension using HAL from SQL server table.

You can also load it from flat file (text file or .csv file)

I am using following adapters to complete loading:


  1. Variable

  2. Planning Adapter and

  3. ODBC adapter.

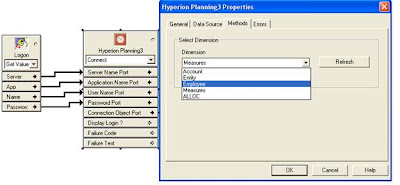
The complete loading flow diagram is shown below:


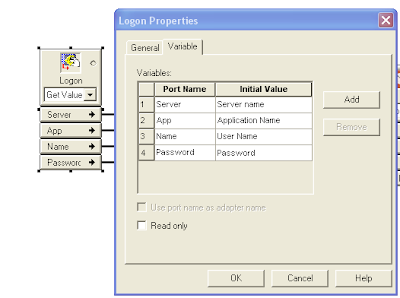
The first adapter is Variable adapter.
we use this adapter to give log in information and application details.


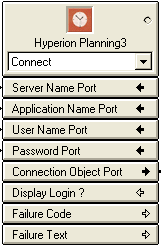
The second adapter is Planning adapter. We use this adapter as a connector to Planning application. This adapter is fed from variable adapter. Make sure that you change setting to connector in this adapter.


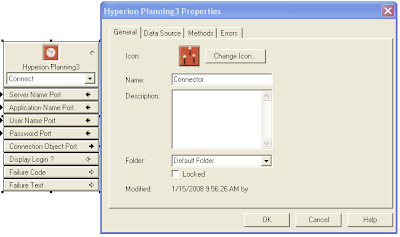
In the General tab you can give custom defined name to adapter like Planning Connector etc.


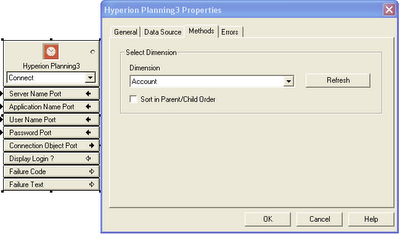
In the Methods tab you should specify which dimension you are loading in the drop down menu. In this example we changed the dimension to employee as we are loading meta data related to employee.


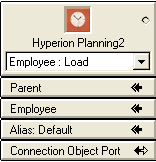
The third adapter is planning adapter again. Make sure that you change the drop down to load as shown below:


You can specify the name of the adapter. For example Planning load adapter etc.


In the methods section you should specify the dimension you are loading to. In this example we are using Employee.


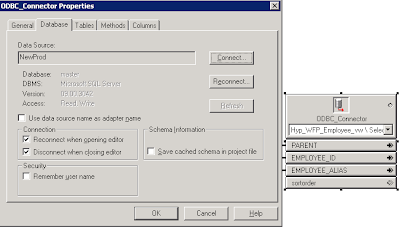
The last adapter is ODBC adapter.


You should create a DSN for the relational database in the location where you are running the HAL job. Then connect to the relational database.


Select the table which has metadata information.


Once you have all the information. Connect to ports as shown below and save and then run to load metadata.


Hope this helps.